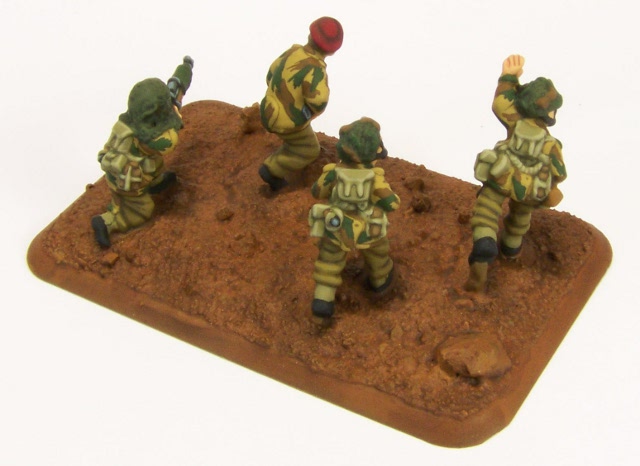
How I do it, not necessarily how it has to be done. I've been meaning to do this one for ages. I started it quite some time back, then misplaced half the pictures of the painting bits so had to re-do them, new ones probably turned out better anyway. This might sound a bit long-winded in the text, though the actual process is very simple.
I start off by scoring the plastic bases (or MDF if you're using that instead), not too heavily, but enough to give the glue something to "grip".
 |
| Base scored |
After scoring I "dry fit" the figures: this is simply to establish the position of each figure, i.e. where I want it to be, and also allows me to place weak parts, i.e. MP40 barrels and rifles with bayonets, either to the inside of the base, or at least facing somewhat inward to protect them. Notice the rifleman below with the spike bayonet was place to the inside of the base exactly to protect the weapon. In the case of this particular pose the figure could be positioned anywhere in the middle area of the base or even the far right with weapon facing inwards, however I would never place this figure on the far left of the base as the weapon and bayonet will only take unnecessary damage there. Just something to consider.
Note:
If the figures have especially thick bases (say more than 1.5mm) I file them down during cleanup, before undercoating. This helps with basing since you don't need to add as much basing material to build-up to the level of the bases.
 |
| The "dry fit" |
After the position of the figures has been established, I mix up a sufficient quantity of a two-part epoxy glue, usually enough to do 1-2 bases at a time, and spread about a 1mm layer over the base. For years I've used
Pratley Quickset White glue (4th one down), though anything similar will do the job.
 |
| 1mm layer of epoxy glue |
The figures are then placed in their positions. By gently pressing the figures into the glue, a (not particularly strong) "suction" is created, pushing glue from under the base to the sides. This will help later when applying sand to hide the figure's lead bases.
 |
| Figures placed in position |
Gun are done in a similar manner, though before undercoating I glue small pieces of plastic card or cardboard under each wheel or trail to act similarly to the figure's lead bases. This prevents the guns from being "buried" into the basing, a common problem that this easily fixes.
 |
| Nevbelwerfer and crew |
 |
| Dry fit, note the plastic card bits glued to the Nebelwerfer to act as "bases" |
 |
| Glued in place |
After the epoxy glue has dried for at lest a few hours (preferably overnight), the next step is to apply sand to the base. In the picture below you can see a simple mix I use, of fine-grained plaster sand mixed with smaller amounts of larger particles (river sand in local terms).
 |
| Base on top of the sand mix, for scale purposes |
I apply a layer of Wood Glue (PVA/White glue, etc.) over the base, moving the glue with a cocktail stick/toothpick to cover all the base except the beveled sides. I also place some glue onto the figure's lead bases to help hide them. This doesn't show too well below as the glue is also white, though you can see the glue on the figure bases to the left.
 |
| Left with wood glue, right without |
Once done, place in the sand mix and cover. I leave the base completely covered for 30 minutes or so, to get a good layer of sand over the base. Again, this helps to hide the bases as more sand is actually "glued" in place rather than a thin layer and this covers them better. Don't overdo the wood glue though, as you can add too much. Again, about a 1mm layer spread over the base should prove sufficient.
 |
| (Half) Immersed in a sea of sand |
After 30 minutes, take it out, tap off the excess and leave to dry completely (6 hours or just overnight). At this point you can still remove larger particles (rocks), so if you have a running figure and he's about to run into a rather larger boulder, best remove it and repair any gaps with more fine sand.
After the wood glue has dried completely, I take a soft brush and brush off the excess sand particles. Then on to painting.
The Painting Bit
I use a pretty simple base painting process which looks much longer here than it actually takes. Here I've used the same colours you can see on many of my infantry and gun bases on the blog: it is not particularly "realistic", but is does look fairly good. Since I used this scheme on several projects, I've continued to use it to match units within the same army. Any similar colours can easily be substituted, e.g. Vallejo, and Vallejo undoubtedly covers better and faster. This base however had to match the rest of the platoon, and the colours used reflect this.
To start off, I paint a thinned layer of Flat Earth (or equivalent) over the base. In my case I had a litre mixed at a paint shop to match the Vallejo Flat Earth colour. This is thinned somewhat, still being able to cover but without clotting the sand detail. It also acts as a binding agent on the sand and binds any tiny particles to the surface. Paint carefully around the figure's boots and such; I use old knackered small brushes for this. Leave to dry for awhile...until it looks dry.
 |
| Thinned Flat Earth layer |
After the first layer has dried, I apply a wash of thinned Americana Chocolate Brown, mixed about 1:1 with plain water. This is applied over all the base, enough to pool in the details but not "flooded" over the entire base. Again, paint carefully around the boots or any prone figures, and so on.
 |
| Dark brown wash |
Dry-brushing begins: here I used Americana Raw Sienna. This was heavily dry-brushed over the sand, attempting to cover as much of the base as possible while leaving the darker brown in the recesses.
 |
| Raw Sienna dry-brush |
Next, I dry-brushed a layer of Americana Honey Brown, more lightly this time, attempting to catch the raised details of the sand and leave the rest untouched.
 |
| Light Brown dry-brush |
I then pick out the rocks. To match the previous
British Airborne Troops I've done, these rocks were done in grey, first layer Americana Payne's Grey, a dark blue-grey though any similar will do. Originally taken from my Middle Earth basing for Lord of the Rings figures, the grey rocks are again not particularly realistic, but look alright. After the initial coat of dark grey, I add small amounts of white to the mix until, doing 2-3 layers on the rocks, the last being quite light and aimed more at catching the edges for definition.
(
A better rock colour, one I tend to use now when not attempting to match older units, is to start with Vallejo US Olive Drab, then dry-brush by adding increasing amounts of Vallejo Stone Grey up to pure Stone Grey to catch the edges. The equivalent of GW Foundation colours are Charadon Granite and Dheneb Stone, which gives a similar scheme. Mixing beige, light brown or even flesh colours into the Olive Drab can also give more varied results for painting rocks.)
 |
| Dark Grey applied to "rocks" |
 |
| Dry-brushed with some white added to the mix |
 |
| Add more white, and a bit more |
After painting the base completely and letting them dry sufficiently, I make a dilute mix of wood glue and water, about 70:30, and spread this over the base in an irregular pattern. I then cover the glue with static grass,
and leave to dry overnight. This ensure a far better coverage of static grass than the "dip and tap off excess" approach. In this example I've used Noch static grass (spring or summer, don't remember which one it was exactly).
 |
| Static Grass applied |
Add a few Silflor tufts of your choice...
 |
| Tufts... |
...and done.
 |
| Among friends |
If it looks time consuming and complicated, it really is not. In the time it took to put this together I could have based a couple of platoons, easily.
CdlT