
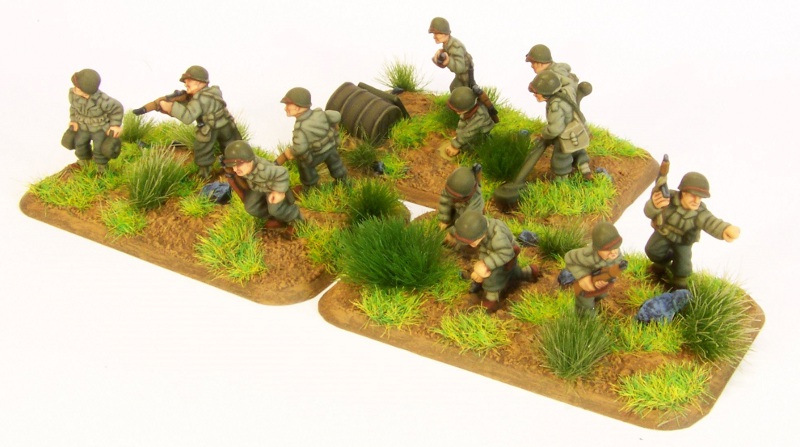
Command team, 6 x Pioneer Rifle teams, 2 x M1917 HMG teams and 3 x Bazooka teams


I'd be interested in getting some Forged in Battle casts to see how they compare with the old BF range which is still IMO the best US WWII infantry range (don't get me started on the "new" range). Despite my liking for these figures, I still feel US infantry are a little under-represented in 15mm, which is a pity as they are an interesting subject.
CdlT

I put your blog in my favorites, always good to browse it!
ReplyDeleteAre these old US figures you are talking about? Do you have a pic?
Thanks Braxen! These are the "old" sculpts by Evan Allen, the newer BF range was done by Seth Nash and is not nearly as good. I've painted a few (e.g. here: http://i192.photobucket.com/albums/z13/Chevalier_de_la_Terre/US%203rd%20Armoured/M10Recce.jpg) but I generally avoid them wherever possible.
ReplyDeleteCdlT
These look just superb and not surprising coming from you!
ReplyDeleteChristopher
Awesome work !
ReplyDeleteI tweaked the same blister to fit my load out options.
I used 3 men to a stand ... using the barrel and additional effects to make sure they stick out as engineers.
Since I used 1 less man per stand I was able to make 2 stands of 3 men each extra as the optional rifle stands that can be switched out with the HMGs at the beginning of deployment.
Thanks Joe! US Combat Engineers are definitely one of the coolest and most versatile platoons in the US armoury.
ReplyDeleteCdlT
Hi Crac,
ReplyDeleteAgain excellent paint job.
Can i ask you something, How you make
infantry bases? Regular sand or pumice
something?
If it possible, maybe you can tutorial
about this? Will be very helpful.
Regards.
Hi hokkabaz,
ReplyDeleteI glue the figures to the bases with a 2-part white epoxy (Pratly Quickset White Glue), spreading a thin (about 1mm) layer over the whole of the base, then positioning figures and pressing them into the glue.
The sand is just fine sand (plaster sand) glued on with wood glue/PVA, on top of the epoxy glue as it doesn't adhere very well to plastic and lead.
I'll look at doing a tutorial when I get a chance.
CdlT
Beautiful work as always. The highlighting and clean look of the paint is just fantastic.
ReplyDelete