So a mate and I had been talking of doing an Axis of Attack campaign for a while now (read months and months). Since we both had forces which would fit the area and combatants fairly well, we went with The Breville Gap campaign on pages 48-52,
D-Day.
This covers German counter-attacks after the D-day landings and the 6th Airborne Division’s drop in the Orne Bridgehead area. German forces have managed to successfully hold onto the town of Breville and from there will launch counter-attacks in an attempt to re-take the bridges over the Orne River. The British naturally want to prevent this from happening and in turn eliminate the Germans in Breville.
Since the 1st and 4th Special Service Brigades were actively involved in the area I would be fielding No. 6 Commando from the Commando PDF on the FOW Site, using the “Orne Commandos” list. Colin would be fielding Grenadiers (ostensibly 346. Grenadier Division) from Fortress Europe. Both armies were set at 1750 Pts.
In the campaign the Germans have the option of attacking out of Breville towards either Amfreville or the Bois Mont region. If their first attack fails, they may declare it to have been a diversionary attack and attack again in the other region instead. Colin elected to attack Amfreville up first, so we set up the table using the (very short) terrain guide in D-Day. The Germans would be attacking in a
No Retreat Mission.

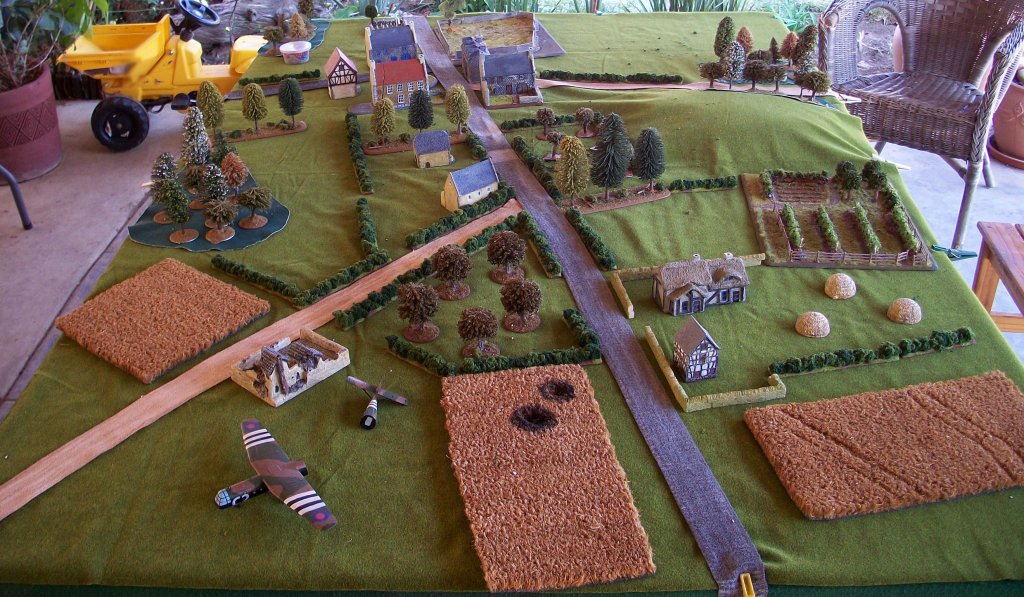
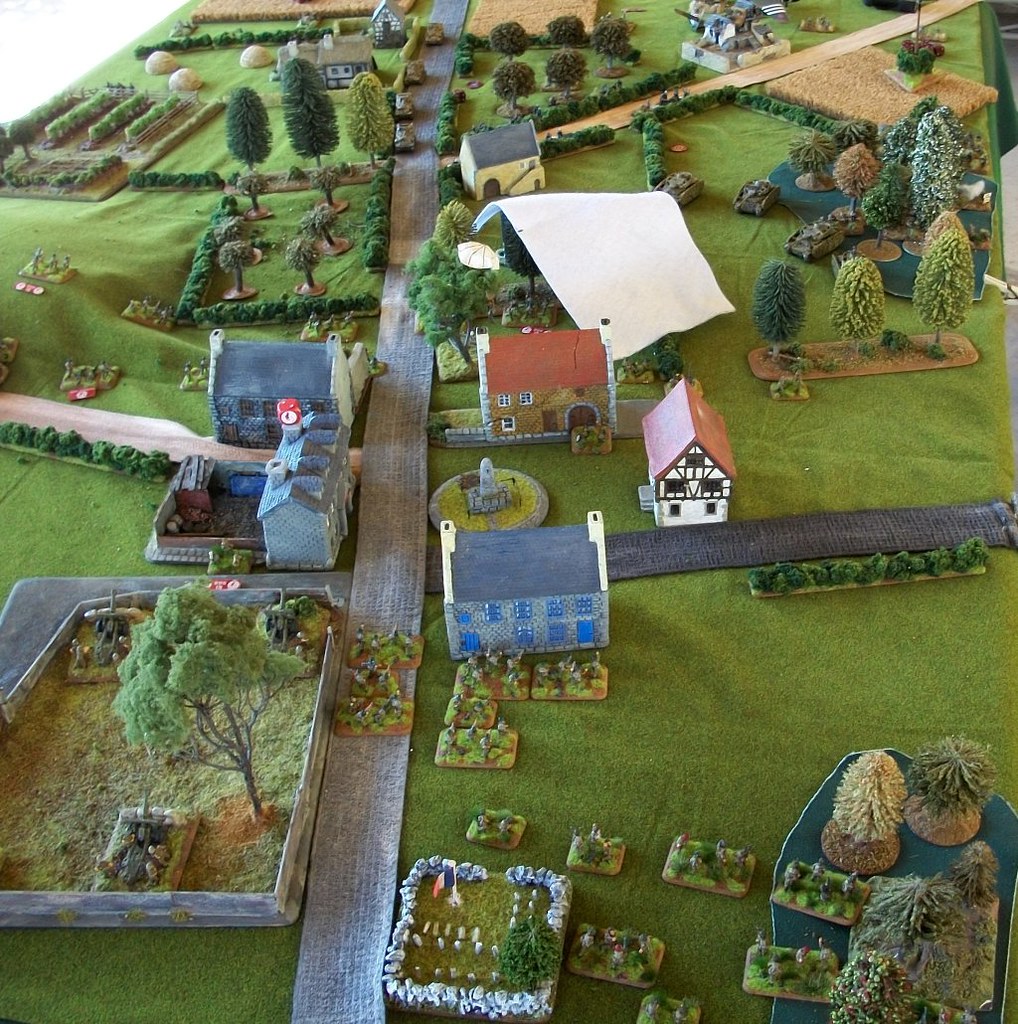
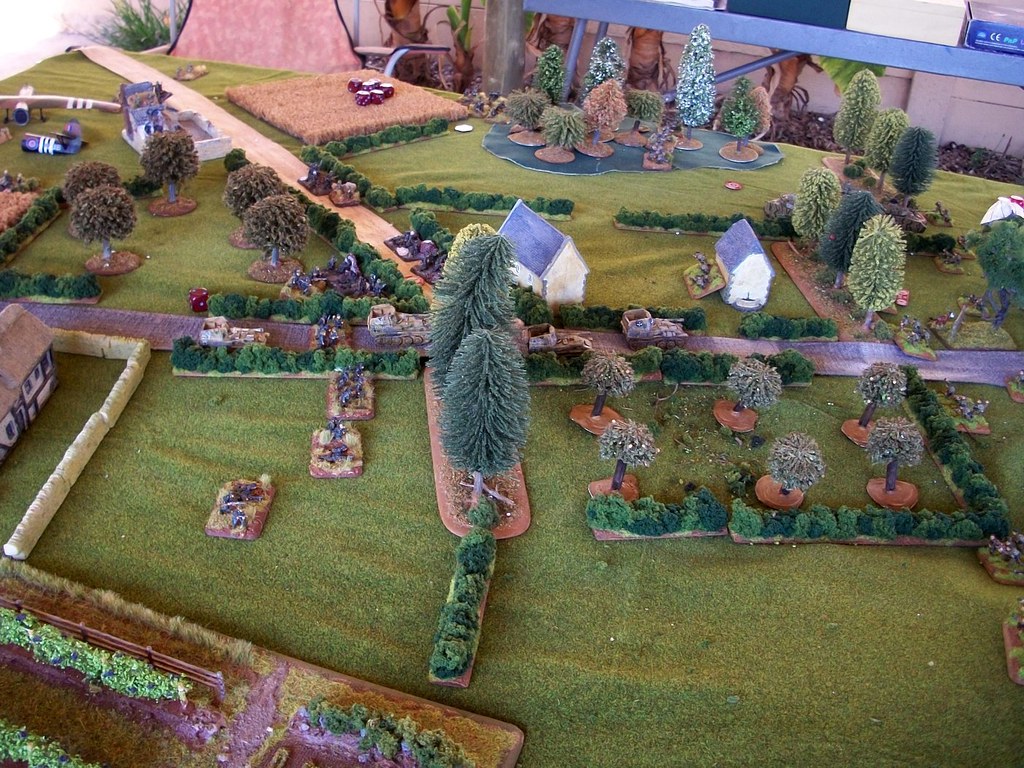
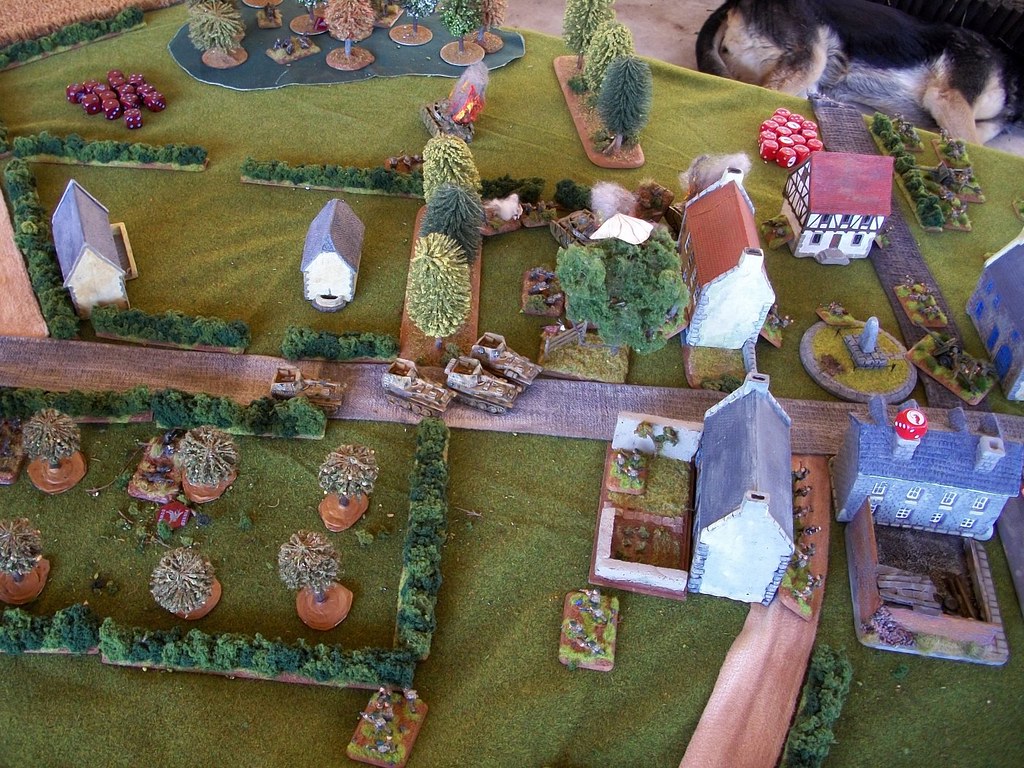
The village at the top represents Amfreville. The terrain brief notes a few farms scattered along a road running from one table edge to the other, the rest was largely made-up. Also we had to discard much of the “pretty” terrain: an annoyingly strong wind kept blowing over anything which was not weighed down.

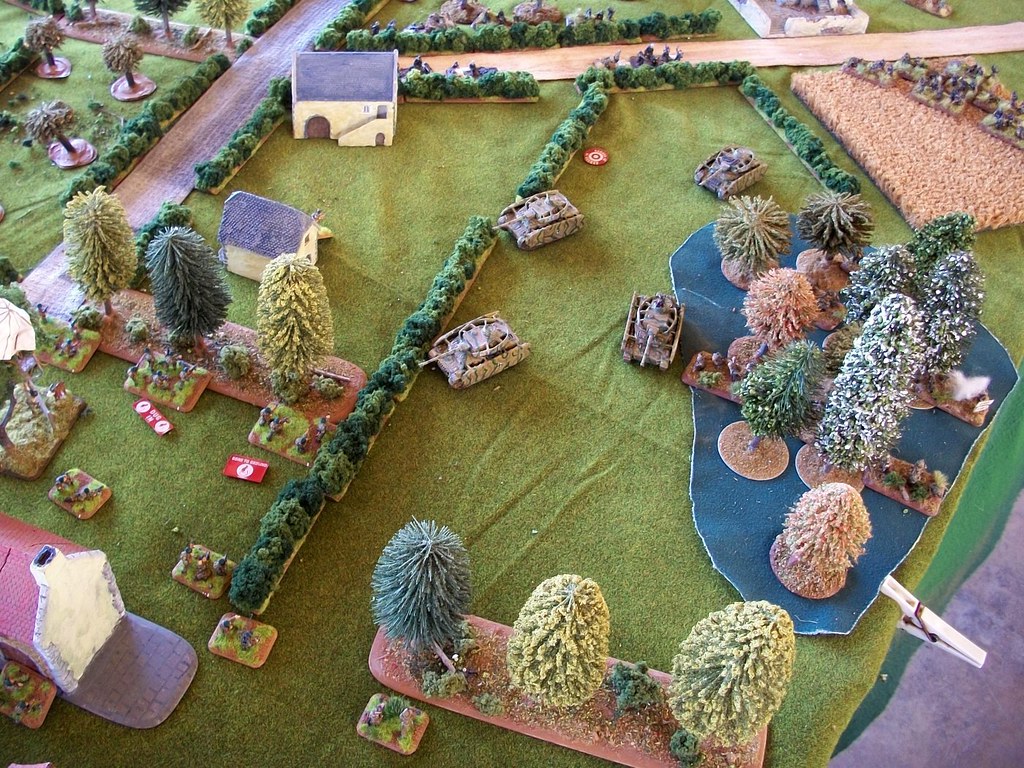
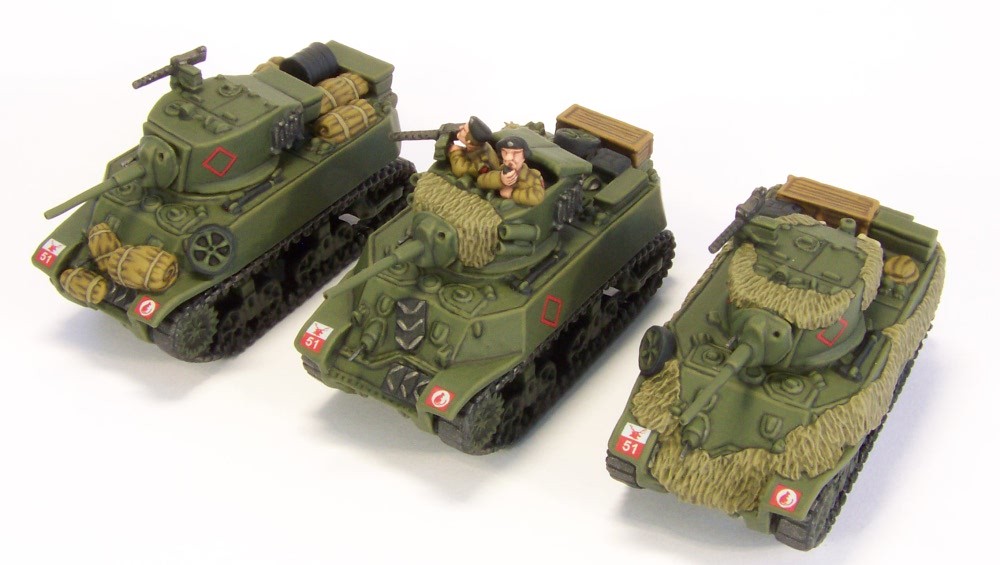
Initial Commando deployment: Full 25-pounder Battery, a 2-Section Troop and the Airlanding 17-pounders in ambush. Off table were two more Commando sections and an Airlanding platoon. The British also had Limited Air Support (Typhoons) Objectives are the destroyed tank on the left on the reverse slope of the hill and the cunningly disguised tree (with hanging parachutist) in the centre-right. Independents teams at the bottom, waiting to deploy.

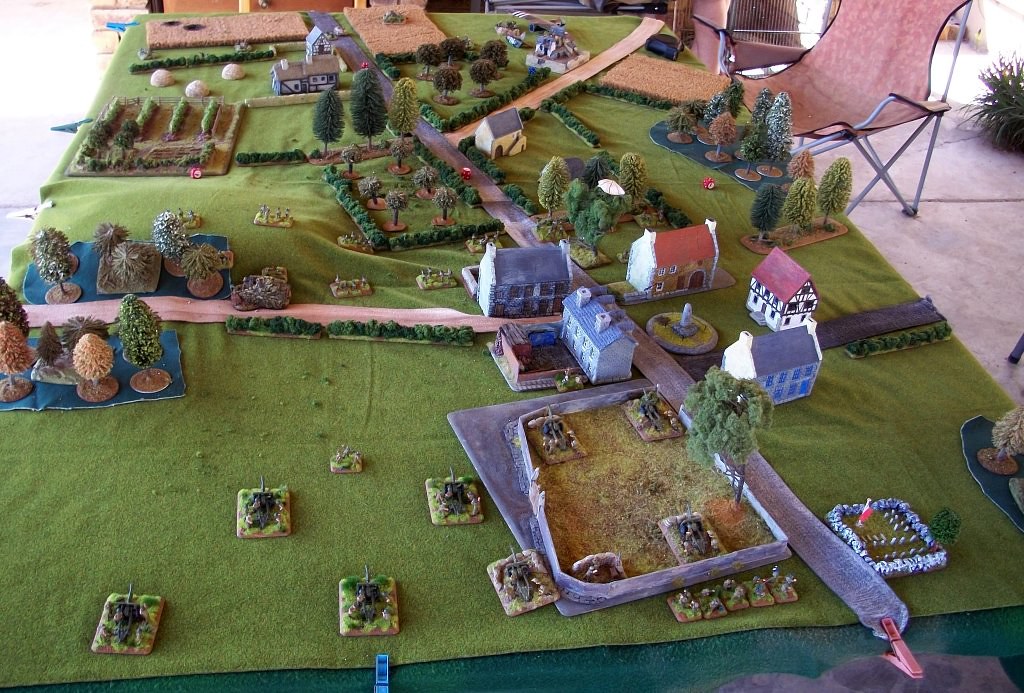
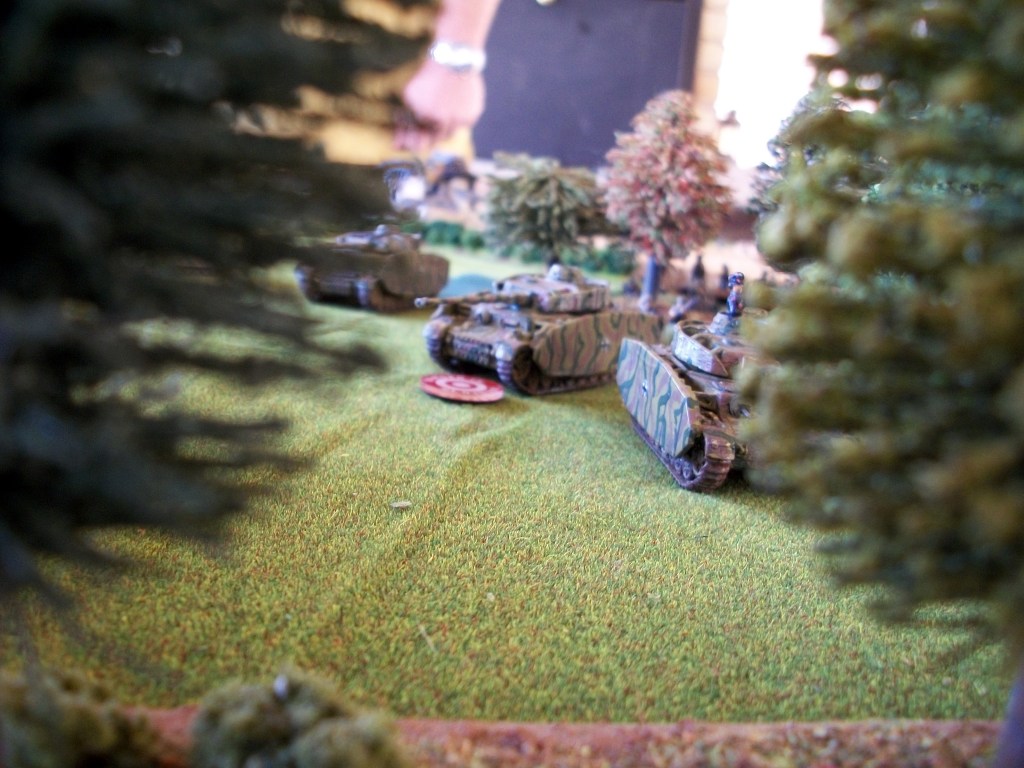
The German Deployment: (from left) Grenadiers, HQ Mortars, Panzer IVs, 2 Squad Black Pioneers, more Grenadiers, Nebelwerfers, Marders, more Grenadiers & HMGs, 7.5cm Infantry Guns.

The German left.
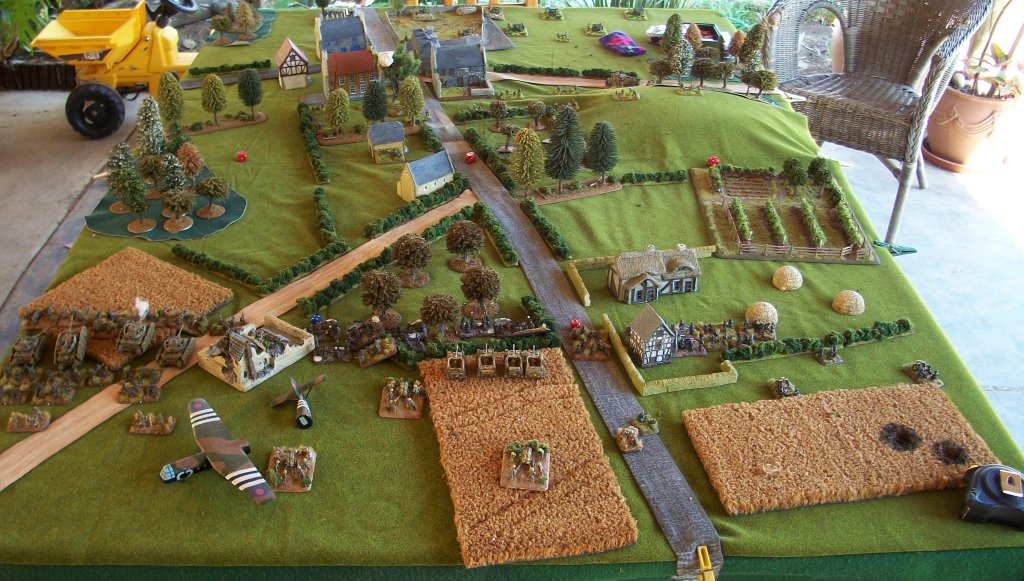
The first German saw movement across the board, Grenadiers advancing everywhere, Marders hanging back a little and PZ. IVs attacking up the German left flank with Black Pioneers moving in to the woods on the German far left, another platoon of Grenadier following. German artillery failed to find targets.
The German Company Commander, advancing through the centre orchard with a Grenadier platoon, moved out too far ahead of the platoon. Just in 16” of three Commando Rifle/MG teams he was mercilessly gunned-down on the first turn. In my victory dance I forgot to take a picture...
Artillery hit a Pz. IV but I failed FP, Air failed to range in and everyone else stayed GTG. No reserves.

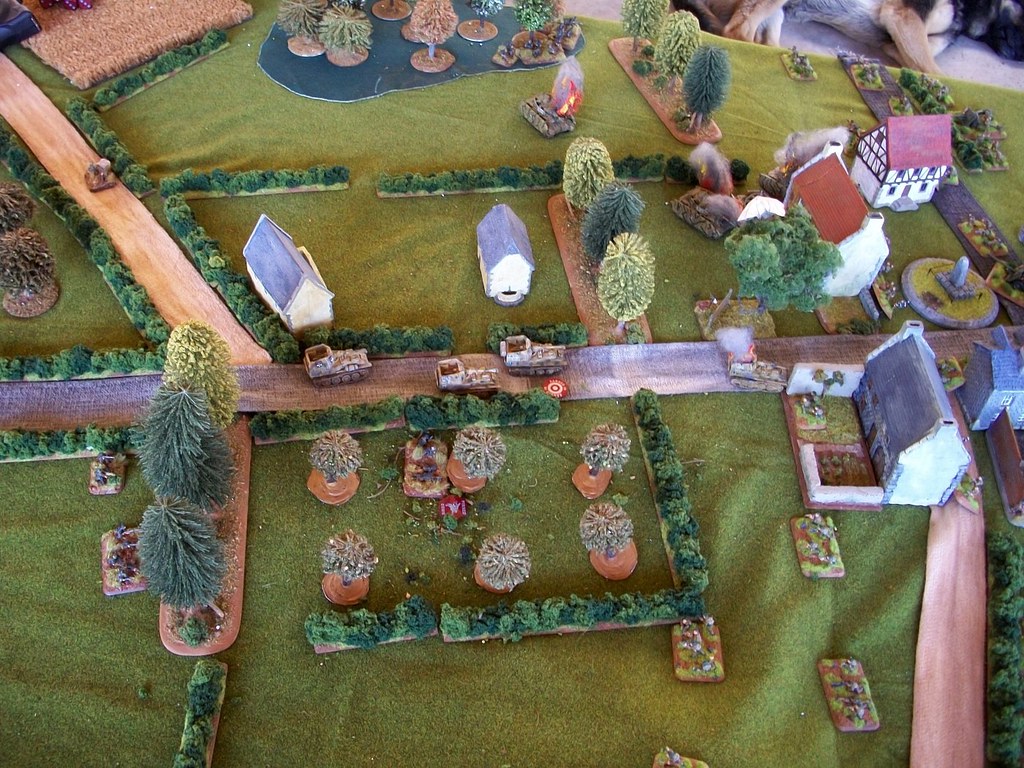
Turn 2 saw the Germans advancing aggressively up their left with Black Pioneers and Pz. IVs. Grenadiers continued to advance slowly through the centre orchards into the road fork. Maders moved down the centre road.


Nebelwerfers smoked the centre observer and my right-most Commando Section but placement missed the 25-pounder observer (behind the tree-line on the right). MG fire from Pz IVs is ineffective.

In my bound the Airlanding Platoon and a Section of Commandos come on from reserve, the latter doubling. Half the 25-pounder battery ranges in on the Grenadier on the centre road fork, pinning them down and killing a base. The other half of the battery failed to find any targets from the sea of Germans in front of them!

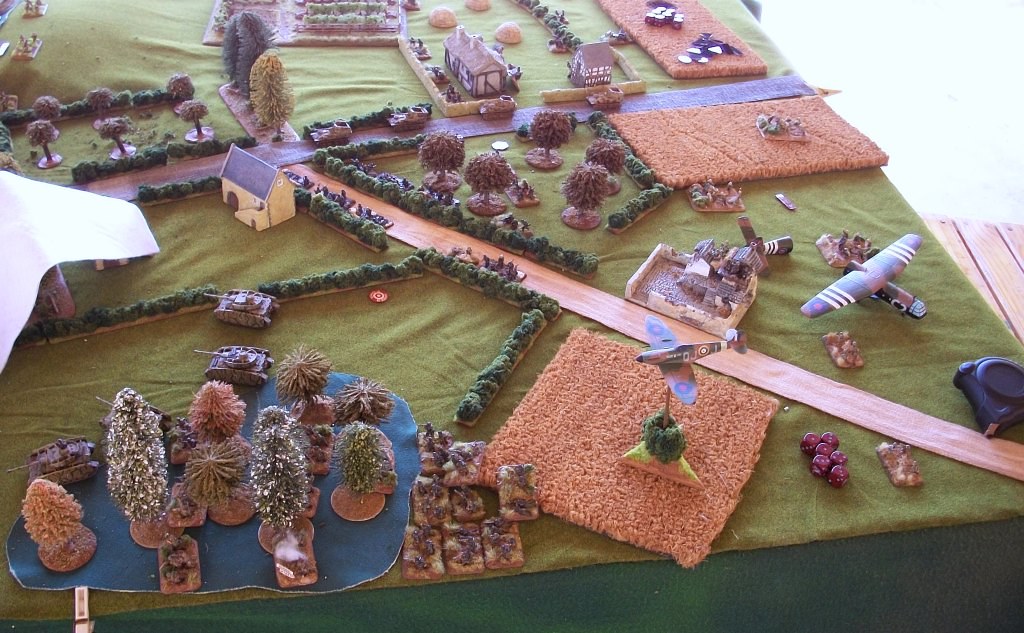
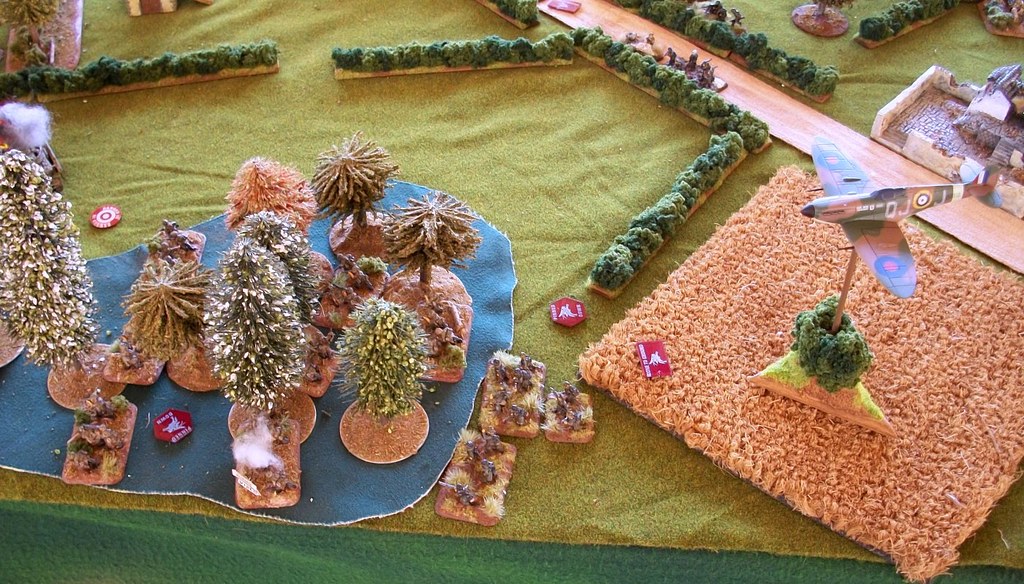
Air provided one aircraft which spotted a Grenadier platoon advancing lethargically up the German left. Despite needing re-rolls I ranged-in on the first attempt, had the entire Grenadier Platoon under the template and one from the Black Pioneers. I hit the latter, and killed an attached HMG and two infantry from the Grenadiers, pinning both platoons.

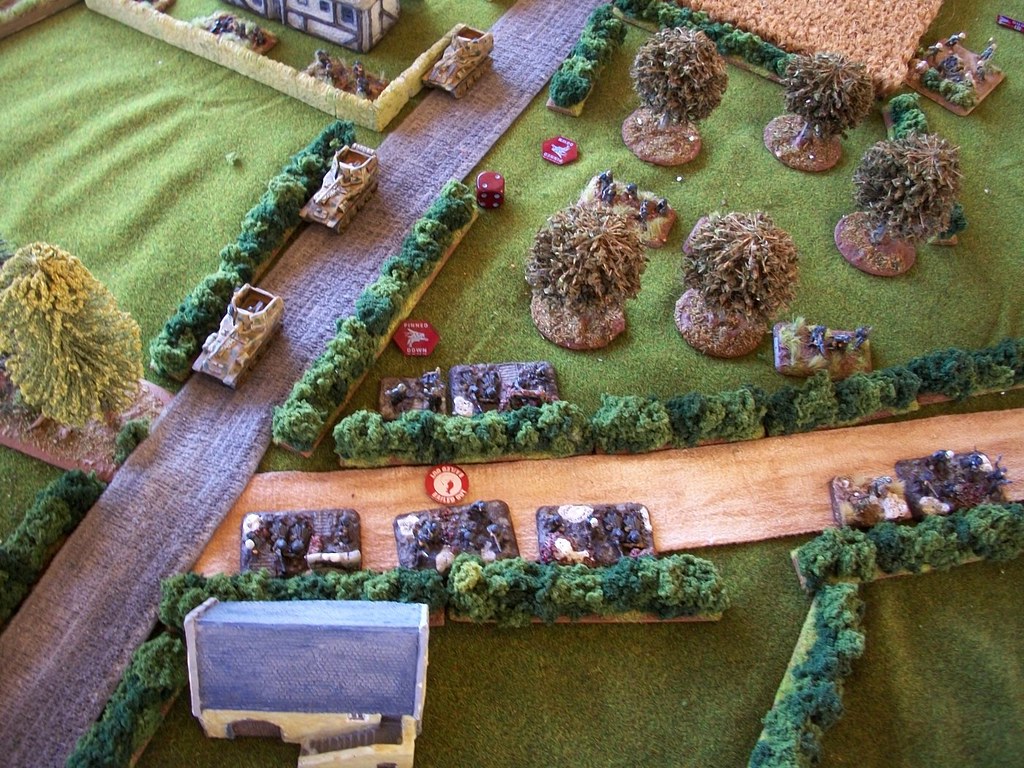
A view from just above the head of my 25-pounder observer and the ranged-in marker.

Marders coming down the road...

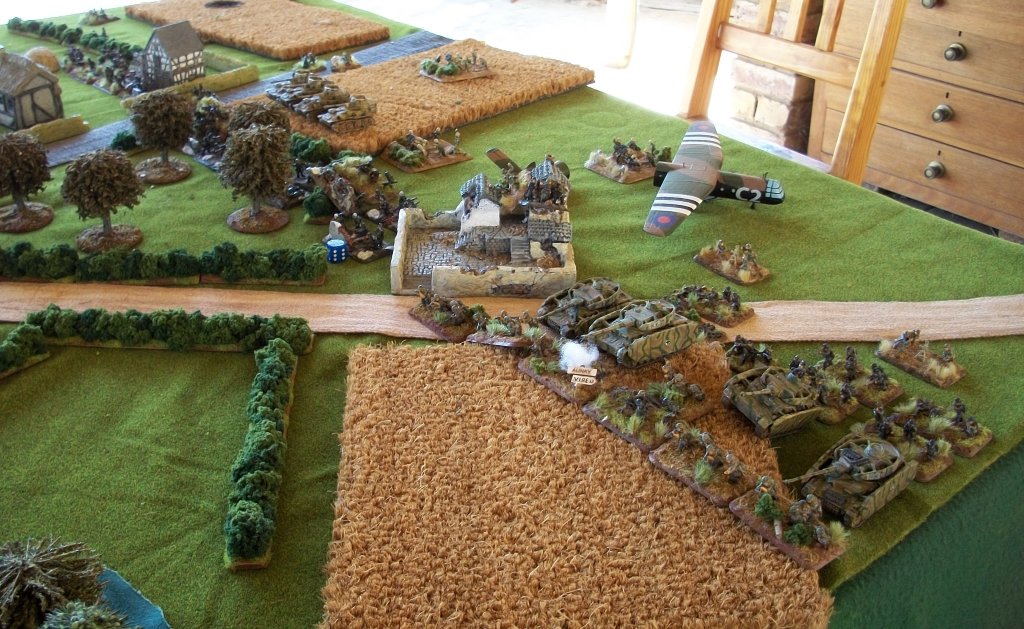
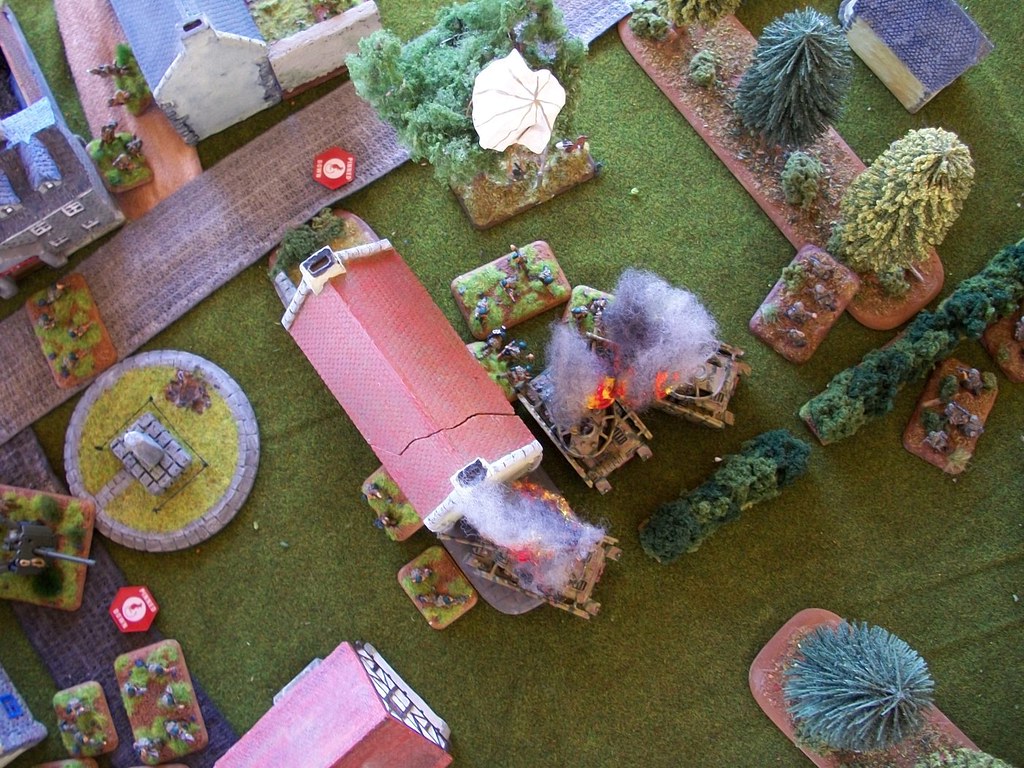
Turn 3 and German infantry across the board fail to un-pin, the 4th (rightmost) platoon beginning to advance where the others have stalled. Marders creep forward a little closer. Nebelwerfers pin the centre Commando Section. Frustrated, Colin launches the Pz. IVs against the Commando Section on the centre objective (above) who also have Peter Young in tow.

The Pz IVs pass bogging checks for hedge. The PIAT hits in defensive fire, but Shurzen save the tanks from any damage. The Pz IVs then destroy two Commando bases. The Commandos counter...

...and naturally the PIAT rolls a “1”. The others all hit, but do no damage apart from forcing the tanks to break-off

No reserves. I respond by ambushing with the Airlanding 17-pounders and moving previous reserves up further. 17-pounder fire is terrible: only one Pz. IV is hit and KO’d. 25-pounder drop shells on the road fork, killing two bases. Other artillery fire hits the Black Pioneers but causes no casualties.

One aircraft comes in again, deciding to pick on the still pinned Grenadier platoon at the back. Strafing successfully takes out another two bases but the platoon passes motivation and later moves to hide in the woods.


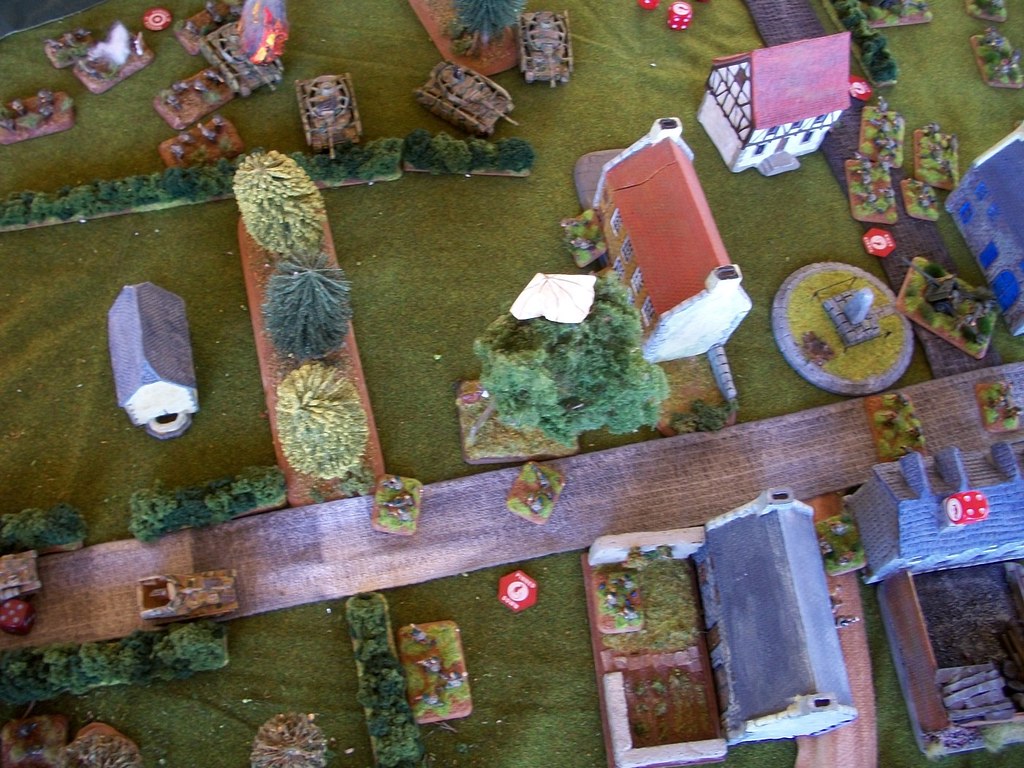
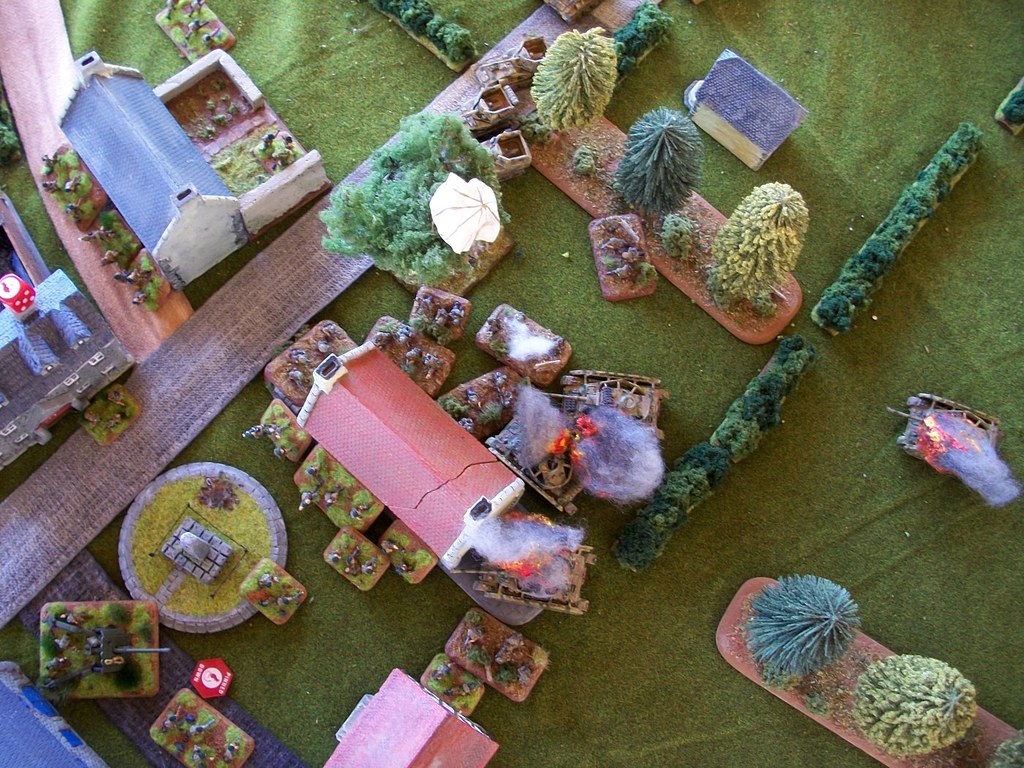
Turn 4 saw the German infantry un-pin across the board and get moving. The reduced Grenadier platoon in the centre moved up to assault the Commandos who still held a house in the farm, while the Pz IVs and Pioneers also moved up intending to get to grips. Combined Nebelwerfer, Mortar and MG fire pins both Commando Sections.

The Grenadiers in the centre assault, eliminating the base in the farmhouse but then are decimated by the counter attack, quitting the field.

The Pz IVs then assault and destroy the 25-pounder observer. Commandos counter, KO a Pz IV. Tanks counter, pass bog checks to fight teams in the house (!) and destroy another team. The Commandos then destroy the PZ IV platoon (the PIAT gunner finally wakes up) and pull back into the broken red-roofed house, passing motivation. The Pioneers advance using Shooting Was Too Successful to (mostly) line the hedge.

In my bound 4 another Commando Section arrives from reserve on my left. My left-most Commando Section, having had nothing to do all game, opens a withering fire on a Grenadier Platoon in the orchard in front of them, killing three grenadier bases and pinning the palatoon.
Turn 5 sees the German infantry fail to un-pin, Marders move a little further down the road and KO a 17-pounder. My bound five shooting is mostly ineffective.


Turn 6, Pioneers un-pin, move forward to assault with Flame-thrower in-tow. Marders also move forward to the edge of the village. Nebelwerfers pin the Commando Section. Unfortunately (for the Germans) the Flamethrower is too far back to fire, but the assault goes in anyway. Defensive fire drags in the Commando Section to the left of the main assault, pinning the Pioneers and destroying three bases.

In desperation the Marders assault, take a PIAT hit (which bails one) and are driven off by defensive fire.

My half of 6 sees the Pioneers wiped-out by Rifle/MG fire, artillery annoys the Marders and the Airlanding platoon hunts down the surviving Grenadiers at the top of the picture. With no CO and more than half platoons destroyed, the Germans quite the field.
Amfreville remains in British hands!
German high command’s official line was that this was the “diversionary” attack, despite heavy casualties. The real thrust will take place next game in the Bois Mont region.
CdlT