 |
| Not the Panzergrenadiers you were looking for... |
There are many ways of doing this, this is merely the one I use.
I've kept the commentary short since the actual painting process follows the way I usually do it, though some colours have changed e.g. flesh colours. Rather than skip ahead, the picture sequence shows each stage (roughly), warts and all.
Colours are VMC (Vallejo Model Colour) unless noted. The figures are from Battlefront's GE780 Lehr Panzergrenadier Platoon since they're not so cluttered with equipment and camo smocks, etc..
 |
| Black undercoat (front) |
 |
| Black undercoat (rear) |
 |
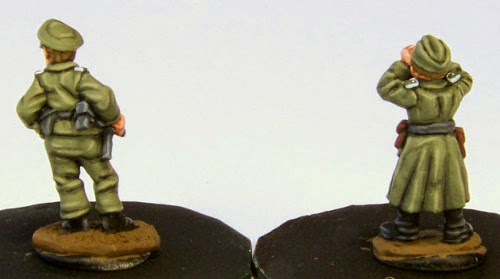
| Flesh Shadow with P3 Idrian Flesh. Helmet covers with 988 Khaki. SMG Pouches, Bread Bag and Ammo Box with 887 Brown Violet. Wood and brown leather with 889 USA Olive Drab. |
 |
| Rear shot of above. |
The colours of the actual Field Grey uniform are quite simple. I paint the figure with a quite dark shadow colour, a 3:1 mix of 830 Fieldgrey and black, then block-paint with pure Fieldgrey. An overall highlight with a 3:1 mix of 830 Fieldgrey and 886 Green Grey, followed by edge highlights and definition lines with pure 886 Green Grey.
 |
| Flesh with P3 Ryn Flesh (nose, cheek bones, around the mouth,, fingers, etc.).Webbing/Black leather with 995 German Grey. SMG Pouches, Bread Bag: 886 Green Grey + 884 Stone Grey, mixed 1:1. Ammo Box: add White to 882 Middlestone until satisfied. Wood: Panzer Aces 311 New Wood. Uniform: 3:1 Mix of 830 German Fieldgrey & 886 Green GreyWeapons and metal 995 German Grey.Brown Leather with 846 Mahogany Sand. Splinter as per usual (different base colour here though). |
The use of 886 Green Grey for line and edge highlights adds a lot of definition to the figure and allows certain areas to be emphasised. For instance, on these Panzer Lehr Panzergrenadier figures, the "Panzer Wrap" nature of the uniform can be emphasised with some well-placed highlights on the uniform collars, giving a lot more definition than usual. Sharp highlights also indicate the close-fitting nature of the uniform quite well.
 |
| Webbing/Black leather with 867 Dark Bluegrey (pick out edges). Uniform with 886 Green Grey for edge and line highlights.Weapons and metal Coat 'd Arms 212 Dark Grey, then 836 London Grey. |
The MG belt was a simple NMM-style caricature, i.e. brass casings and metal bullets, not designed to look like the actual thing but how one "thinks" an MG belt would look.
Similar approach as above on the figures below:
Of course I miss-placed the final pics on bases, but the above pretty much explains how I do it.
CdlT


Very clear and concise tutorial, great work I always dip into these for my own painting . Many thanks .
ReplyDeleteRegards Furphy .
Very helpful, thanks! It's good to know not only the colours you;ve used but the order you've worked in, as it helps to speed up the process and ease the frustration of messing up work you've already done.
ReplyDeleteVery good and clear tutorial :)
ReplyDeleteThanks for posting this - will be a great help when I finally start painting on my Arnhem list.
ReplyDeleteVery nice job, the final result is really impressive!
ReplyDeleteGreat tutorial, thanks
ReplyDeletehow could I miss this update! Very nice figures and painting. I'm looking forward to seeing you paint more in 28mm, they have improved a lot from the caricatural human beings they use to sculpt.
ReplyDeleteLove your painting style! So bright and sharp, your Zeltbahn is astounding!
ReplyDeleteTroy