Colin elected to attack again in the Amfreville region, but for game purposes we decided to set up terrain similar to previous tables and roll for a random mission rather than re-playing the same mission on a similar table. We rolled for Fighting Withdrawal: the Germans would be attacking. The forces were (roughly):
German Grenadiers (Fortress Europe)
HQ & 3 Grenadier Platoons
Black Pioneers
HMG Platoon
7.5cm Infantry Guns
3 x Nebelwerfers
4 x Marder IIIM
4 x Pz. IV H
No. 6 Commando (Orne Commandos PDF)
HQ, Lovat & PIAT
4 x Commando Sections
3 x Commando 3” Mortars
2 x Commando Vickers MMG
4 x M10 3” SPAT
8 x 25-pounders
Limited Typhoons

The battlefield: Commandos chose to defend the right edge; Germans would be attacking from the left.

The British deployment: 25-pounders at the back, wads of Commandos spread across the table, Vickers in the central wood covering the open ground. M10s in Ambush.

Commandos on the right defending the far complex, Colin’s tree objective in the field with the stone walls. Two mutually supporting Sections would have made taking this a tough proposition, and I correctly guessed that the main German thrust would be on the Commando left.

Vickers entrenched in the wood, covering the centre of the table.

The Commando left, another of Colin’s tree objectives. The last objective was placed centrally at the back but never entered the game. The Commando 4th Section was defending in the orchard: they would bear the brunt of the German assault.

German right deployment: Pioneers, Grenadiers and Panzer IVs. The MG Platoon was in the wood, more Grenadiers on the hill with infantry guns and Nebelwerfers behind them.

German left, the refused flank with Marders and another Grenadier platoon.

German deployment shot.
I wasn’t particularly concerned with any of this. I’ve attacked in FW quite a bit and one of the main things is to concentrate your force as much as possible while refusing the other flank, preferably with a mobile unit. I was pretty sure my defences would hold and the ambush had plenty of cover to appear from. That was the plan...
Turn 1
The Germans advanced across the board, successfully “Storm-troopering” all units forward: the Infantry guns dug-in, the Nebelwerfers failed.
In my bound I stayed GtG: artillery and mortar fire hit many German targets but Colin’s saves were good: a Pz. IV bailed and one Pioneer team destroyed, pinned Pioneers and 2 Grenadier platoons.

Turn 2
All German platoons un-pin across the board and advance. The Pioneers swarm forward, but the flame-thrower is too far back to come into action. Scattered MG fire is ineffective, and the infantry guns get a lucky hit to pin where the Nebelwerfers failed.


But Commando defensive fire hits with 6 out of 7 shots (needing 5s) and they are forced to pull back.
In the British half the M10s are revealed and KO two Pz. IVs, the remaining survivor holding. Combined artillery and Vickers fire annihilates the German Grenadier platoon in the farm area.

Turn 3
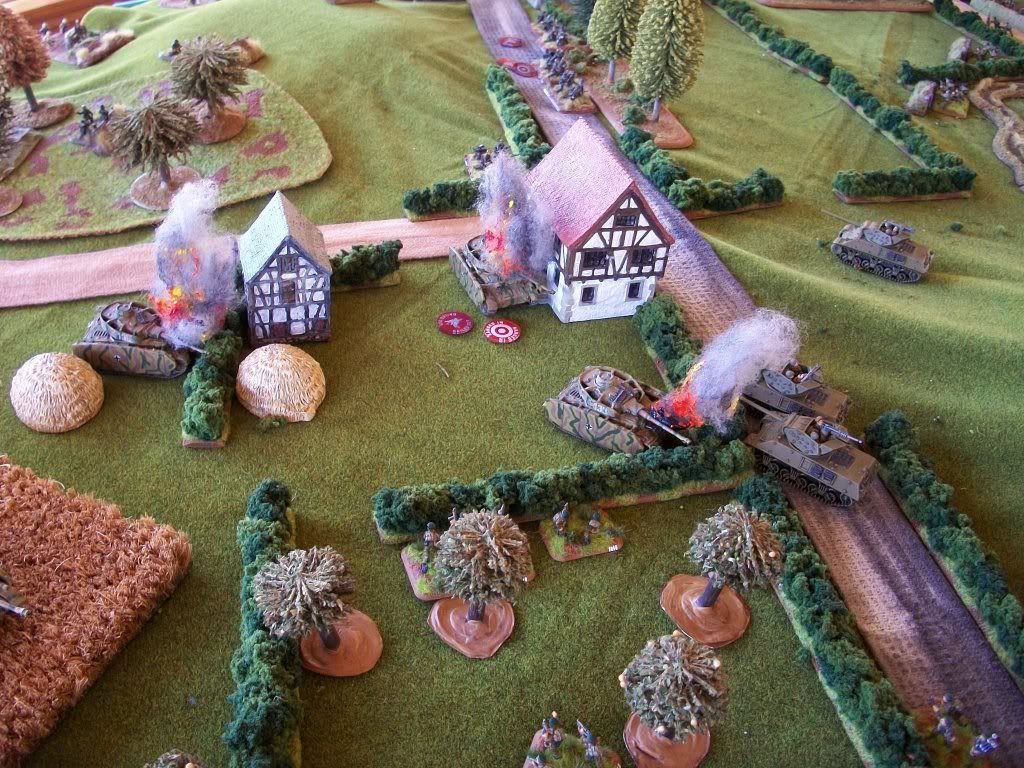
The Germans un-pin on their right: the Pioneers surge forward now with flame-thrower in-tow, which bails an M10. On the German left the Marders and Grenadiers advance pinning the Commando right in place.


The Pioneers again go in: defensive fire fails to pin but causes several casualties. They destroy a single Commando team and the bailed M10.

The Commandos then counter and inevitably destroy the Pioneers over two rounds, losing another team in the process.

On the German left a desperate assault is launched against the Commandos holding the farm. Defensive fire again fails to pin but cuts-down half the Grenadier platoon which then fails to cause any damage (only one team in fight range remaining) and in turn is massacred by the counter attack.

In the British half of Turn 3 the Vickers MMG platoon is removed. The 4th Commando Section advances, intending to finish off the remaining Pz. IV and German Company Commander left alone by the barn. Two M10s move up to engage the Pz. IV, and miss, while the third M10 shoots-up the German MG platoon in the wood, destroying another platoon. 25-pounder fire then bails the remaining Pz. IV. At the end of the Shooting Step the Pz. IV fails morale, quitting the table and taking the attached German CO with him!
Turn 4
With five out of nine platoons destroyed and no CO, the German force quits the field and the Commandos hold the line. That became bloody for the Germans very quickly: their failure to get that first assault in with the Pioneers was unfortunate and allowed British firepower to take a heavy toll. Overall however the key IMHO to FW is concentration: as attacker you get to deploy after seeing the defender's positions, and failure to bring numbers to bear at a single point simply plays to the defender's advantage.
The next game will be a 2nd British attack on Breville: if that fails we might call it a stalemate, or maybe play another round. If the Germans can progress then we might continue, but I don’t really want this going on forever.
CdlT
Really great stuff!Very nice report.
ReplyDeleteCheers
Christopher
Hooray for the British.
ReplyDeleteGreat AAR.